Skip to content
  • Home
  • Pricing
  • Store
  • Home
  • Pricing
  • Store
  • Home
  • Pricing
  • Store
  • Home
  • Pricing
  • Store

Getting started

10
  • Getting Started FAQs
  • Managing multiple accounts
  • UK Fee Breakdown
  • Choosing a Plan
  • Setting up your Sync™ account
  • Customising your home screen
  • Turning on tipping
  • Editing your Statement Descriptor
  • Editing your business & profile details
  • Editing the info on your receipts

Taking a payment

28
  • Multiple ways to take payments
  • Tap to Pay FAQs
  • Taking a payment with Tap to Pay on Android
  • Taking a payment with Tap to Pay on iPhone
  • Tap to Pay on Android – Troubleshooting
  • Tap to Pay on iPhone – Troubleshooting
  • Business Terminal FAQs
  • Connecting your Business Terminal
  • Business Terminal Subscription Terms
  • Card Reader connection troubleshooting – iOS devices
  • Business Terminal Subscription FAQs
  • Changing the Language on your Business Terminal
  • Card Reader FAQs
  • Ordering your Sync™ Card Reader
  • Connect your Card Reader via Bluetooth
  • Card Reader connection troubleshooting – Android devices
  • Connecting your Card Reader via a cable
  • Printing receipts with your Business Terminal
  • Unboxing your Card Reader
  • Returning equipment to Sync™
  • Sending a Payment Link
  • Sending a Subscription Link
  • Taking payments via a QR code
  • Sending a digital receipt
  • Recording a cash payment
  • Adding a description to a payment
  • Customise your payment methods
  • Adding taxes to a payment

Payouts to bank

5
  • Payout FAQs
  • Instant payout FAQs
  • Add or change your bank account
  • How to change your payout schedule
  • Pausing or cancelling automatic payouts

Expense & Reward Card

3
  • Adding your Sync™ Card to Apple Wallet
  • Expense & Reward Card FAQs
  • Adding your Sync™ Card to Google Wallet

Reports & integrations

4
  • Sync™ Web Portal
  • Add payment links to your Xero invoices
  • Integrate Sync™ with QuickBooks
  • Quickbooks Account Mapping

Team accounts

3
  • Team Account FAQs
  • Setting Up Your Team
  • How to use Sync™ as a Team Member

Point of Sale

4
  • Creating your POS
  • Editing products in your cart
  • Saving and reopening a cart
  • Refunding a payment on a closed cart

Cash Advances

1
  • Cash Advance FAQs

Offers & Referrals

7
  • Earning fee-free processing rewards
  • Refer a friend to earn rewards
  • How to redeem a referral code
  • Offers: FAQs
  • How to purchase a Voucher
  • How to purchase a One-Time Offer
  • Referrals FAQs

Chargebacks & Security

3
  • Secure your Account
  • Dispute / Chargeback FAQs
  • Adjusting your Lock Screen

Data & Terms

4
  • UK Fee Schedule
  • Account On Hold Guidance
  • Data & Security
  • Deleting your account

Complaints

1
  • Complaints Policy
View Categories
  • Home
  • Docs
  • Reports & integrations
  • Add payment links to your Xero invoices

Add payment links to your Xero invoices

1 min read

Connect your Sync™ and Xero accounts for low cost payment links on invoices

Connect your Sync™ account to Xero invoicing and take advantage of our payment processing rates when your customers pay their invoices.

Connect your Sync™ and Xero accounts in 2 easy steps #

  1. Connect to Xero
  2. Map your account

Please note: Our integration does not currently support the ability to sync historical Sync™ data into Xero if it is unrelated to Xero invoices.


Step 1 of 2: Connect to Xero #

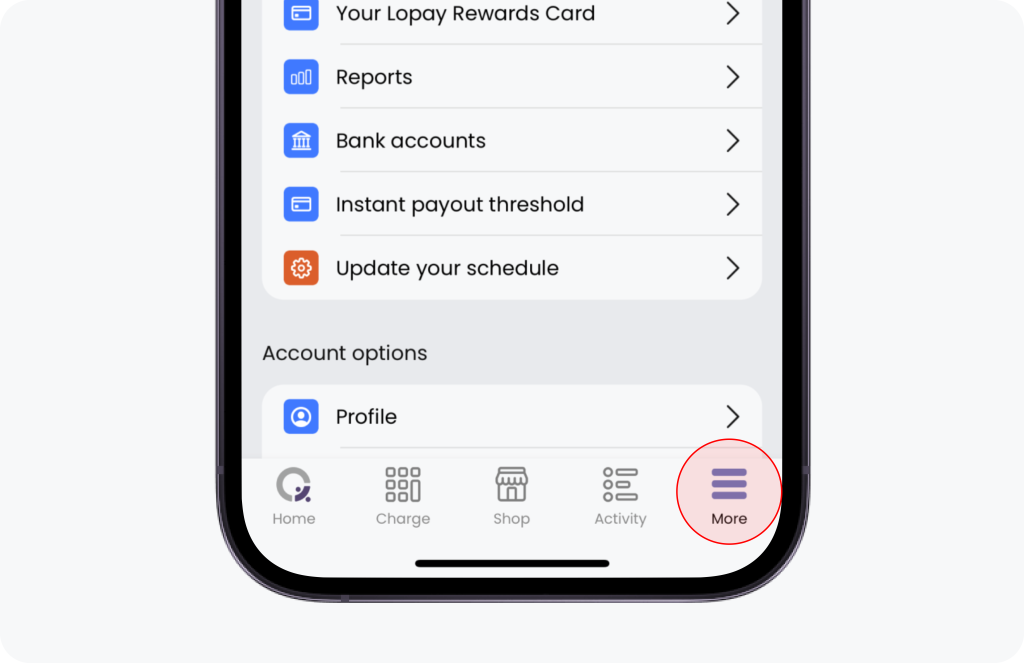
In the Sync™ app, select the “More” tab at the bottom of your screen.

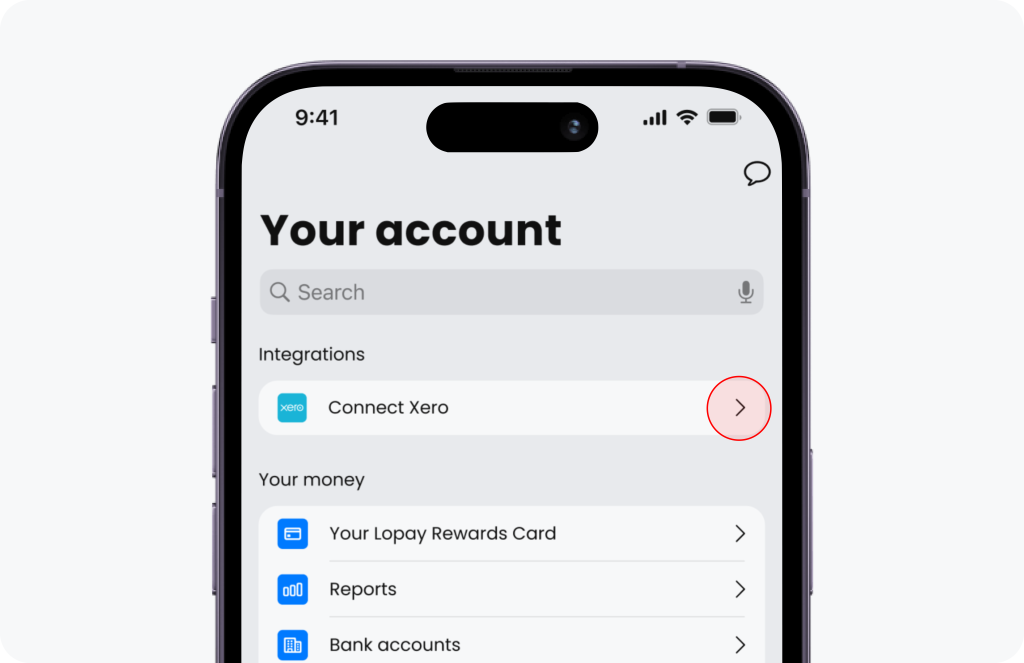
Next select “Connect Xero”.

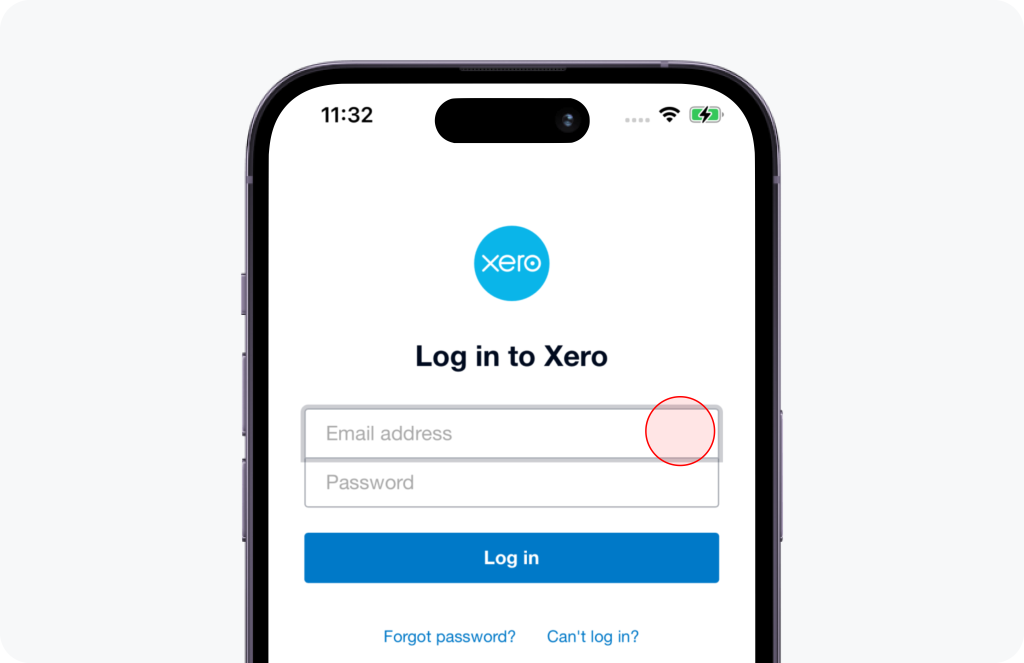
This will ask you to sign in to Xero and connect your account.

Step 2 of 2: Account mapping #

You will now need to select a Xero account to act as your ‘clearing account’ for Sync™ payments. All invoices paid via Sync™ will be recorded and automatically reconciled against the account you select here.

When you initially connect to your Sync™ account with Xero, we automatically create a new clearing account for you called ‘Sync™ clearing [LOPAYCLEAR]’. Feel free to use this account, or use one of your existing bank accounts to record Sync™ payments against.

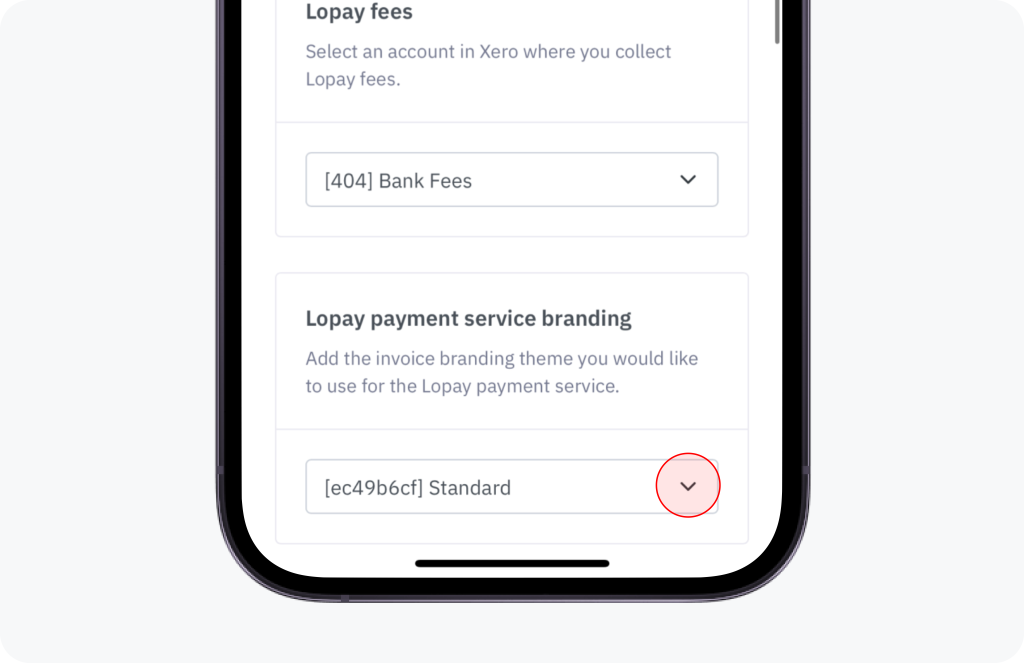
Next, you will need to select an expense account to record the Sync™ transaction fees against.

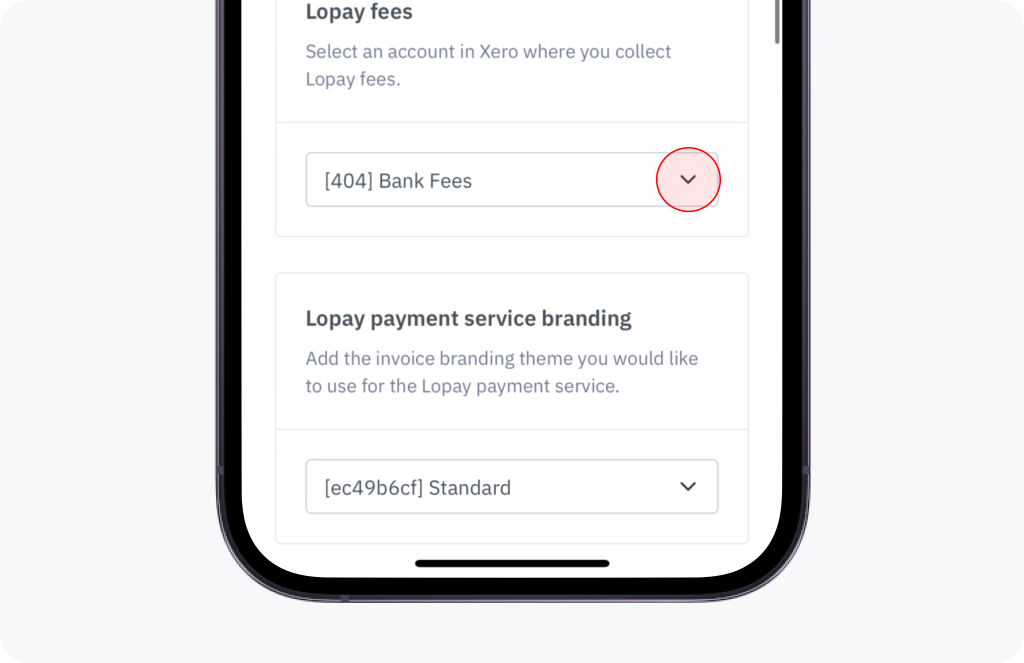
Finally, you will need to select which invoices template (branding themes) you want to use with the Sync™ payment service.

Your Xero and Sync™ accounts are now connected!

After adding your custom URL to Xero, you can now use Sync™ to accept payments for your Xero invoices. You will need to remember to select Sync™ as the online payment method when creating your Xero invoice.


For any further questions or help, please email support@Sync™.com

Updated on August 21, 2025

What are your Feelings

  • Happy
  • Normal
  • Sad

Share This Article :

  • Facebook
  • X
  • LinkedIn
  • Pinterest

Powered by BetterDocs

Leave a Reply Cancel reply

Your email address will not be published. Required fields are marked *

Table of Contents
  • Connect your Sync™ and Xero accounts in 2 easy steps
  • Step 1 of 2: Connect to Xero
  • Step 2 of 2: Account mapping

© 2025 Sync™.