Skip to content
  • Home
  • Pricing
  • Store
  • Home
  • Pricing
  • Store
  • Home
  • Pricing
  • Store
  • Home
  • Pricing
  • Store

Getting started

10
  • Getting Started FAQs
  • Managing multiple accounts
  • UK Fee Breakdown
  • Choosing a Plan
  • Setting up your Sync™ account
  • Customising your home screen
  • Turning on tipping
  • Editing your Statement Descriptor
  • Editing your business & profile details
  • Editing the info on your receipts

Taking a payment

28
  • Multiple ways to take payments
  • Tap to Pay FAQs
  • Taking a payment with Tap to Pay on Android
  • Taking a payment with Tap to Pay on iPhone
  • Tap to Pay on Android – Troubleshooting
  • Tap to Pay on iPhone – Troubleshooting
  • Business Terminal FAQs
  • Connecting your Business Terminal
  • Business Terminal Subscription Terms
  • Card Reader connection troubleshooting – iOS devices
  • Business Terminal Subscription FAQs
  • Changing the Language on your Business Terminal
  • Card Reader FAQs
  • Ordering your Sync™ Card Reader
  • Connect your Card Reader via Bluetooth
  • Card Reader connection troubleshooting – Android devices
  • Connecting your Card Reader via a cable
  • Printing receipts with your Business Terminal
  • Unboxing your Card Reader
  • Returning equipment to Sync™
  • Sending a Payment Link
  • Sending a Subscription Link
  • Taking payments via a QR code
  • Sending a digital receipt
  • Recording a cash payment
  • Adding a description to a payment
  • Customise your payment methods
  • Adding taxes to a payment

Payouts to bank

5
  • Payout FAQs
  • Instant payout FAQs
  • Add or change your bank account
  • How to change your payout schedule
  • Pausing or cancelling automatic payouts

Expense & Reward Card

3
  • Adding your Sync™ Card to Apple Wallet
  • Expense & Reward Card FAQs
  • Adding your Sync™ Card to Google Wallet

Reports & integrations

4
  • Sync™ Web Portal
  • Add payment links to your Xero invoices
  • Integrate Sync™ with QuickBooks
  • Quickbooks Account Mapping

Team accounts

3
  • Team Account FAQs
  • Setting Up Your Team
  • How to use Sync™ as a Team Member

Point of Sale

4
  • Creating your POS
  • Editing products in your cart
  • Saving and reopening a cart
  • Refunding a payment on a closed cart

Cash Advances

1
  • Cash Advance FAQs

Offers & Referrals

7
  • Earning fee-free processing rewards
  • Refer a friend to earn rewards
  • How to redeem a referral code
  • Offers: FAQs
  • How to purchase a Voucher
  • How to purchase a One-Time Offer
  • Referrals FAQs

Chargebacks & Security

3
  • Secure your Account
  • Dispute / Chargeback FAQs
  • Adjusting your Lock Screen

Data & Terms

4
  • UK Fee Schedule
  • Account On Hold Guidance
  • Data & Security
  • Deleting your account

Complaints

1
  • Complaints Policy
View Categories
  • Home
  • Docs
  • Offers & Referrals
  • How to purchase a Voucher

How to purchase a Voucher

1 min read

Purchase an offer and get no fee transactions

Sync™ now gives you rewards on spend with the brands you love. In this article, we’ll show you how you can purchase a voucher within the Sync™ app and get no fees on your transactions in return.

  • How do I purchase a Voucher?
  • How do I claim the no fee transactions attached to the voucher?

For how to purchase One-Time Offers, please click here.


How do I purchase a Voucher? #

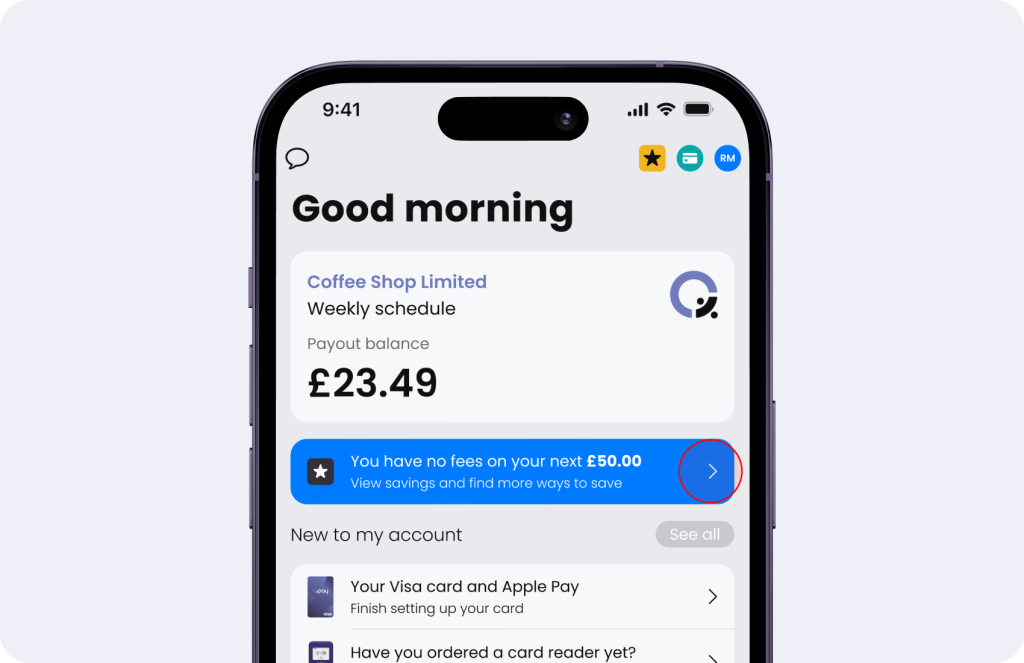
  1. Tap the blue ‘My Savings’ tile on the Home Screen.

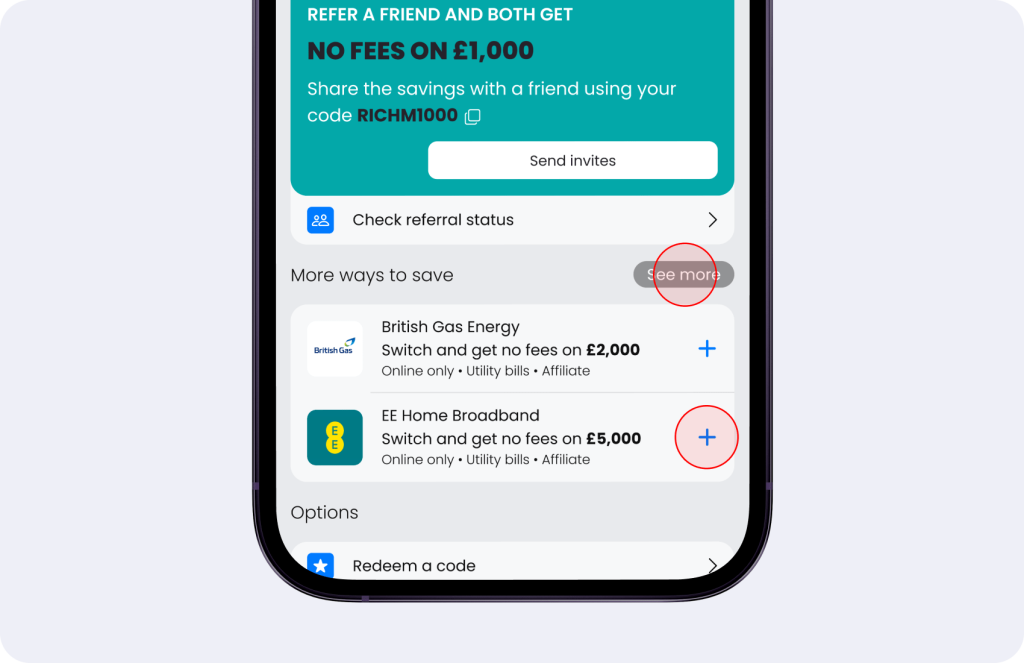
2. Scroll down the ‘My Savings’ screen and tap ‘See more’ next to ‘More ways to save’. Or, tap directly onto a featured offer.

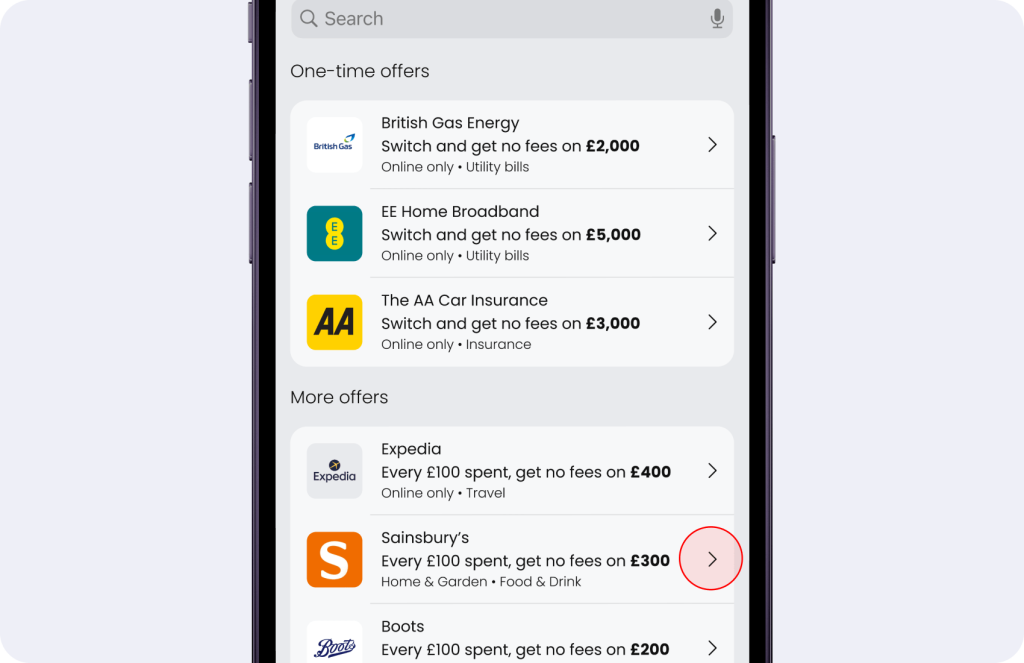
3. Tap the offer that you are interested in. These are listed under ‘More offers’.

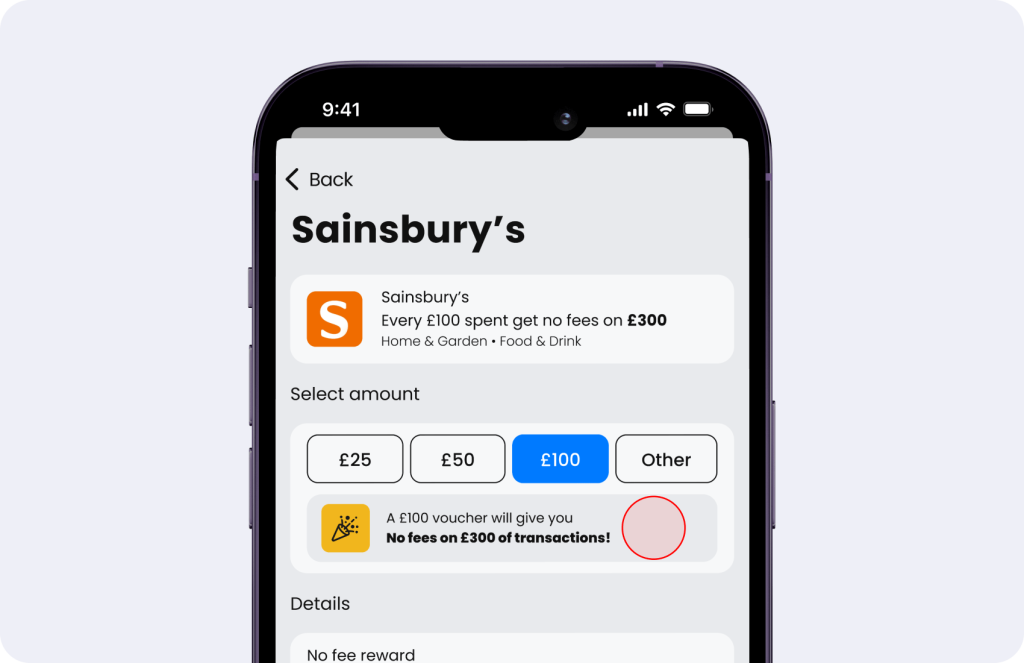
4. Read the offer and select the amount you wish to purchase. Or, tap ‘Other’ to enter your own amount.

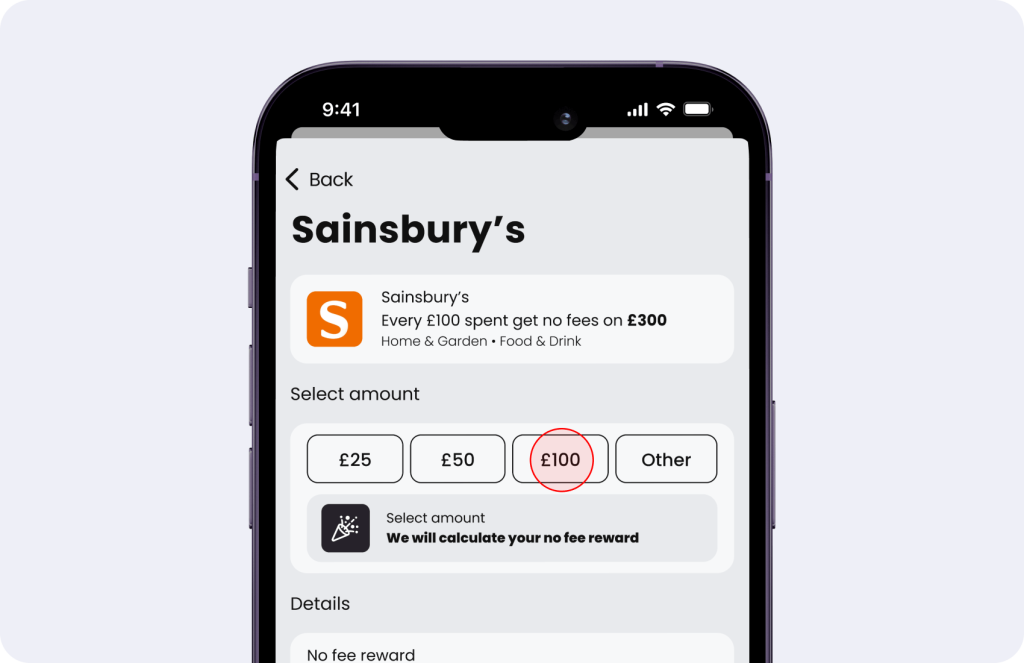
5. You will now be able to see the amount of no fee transactions you can get by purchasing a voucher of that amount.
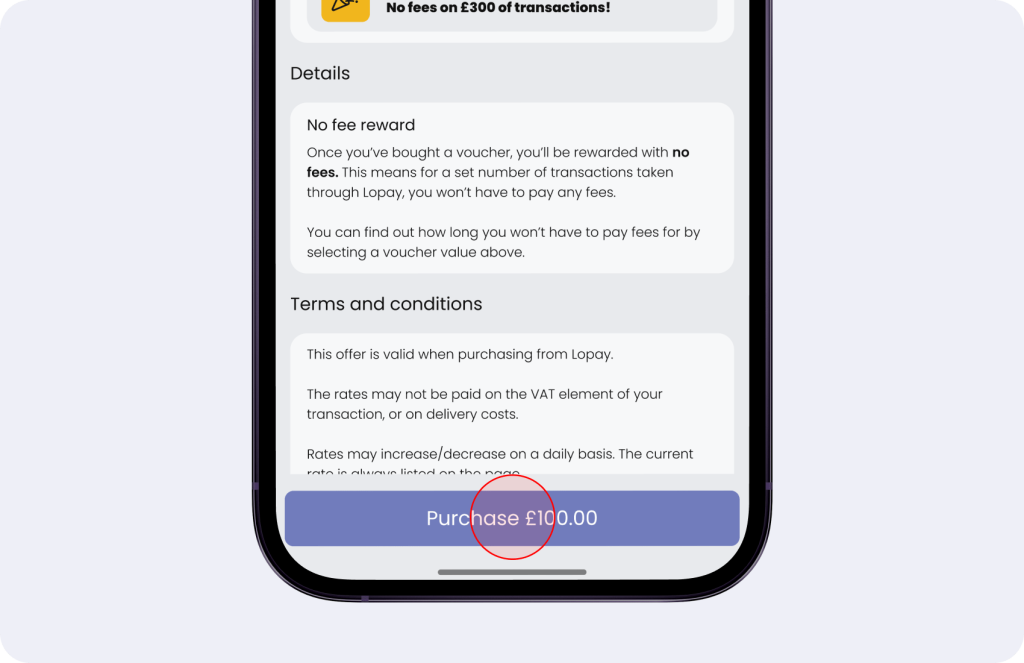
6. Tap ‘Purchase’

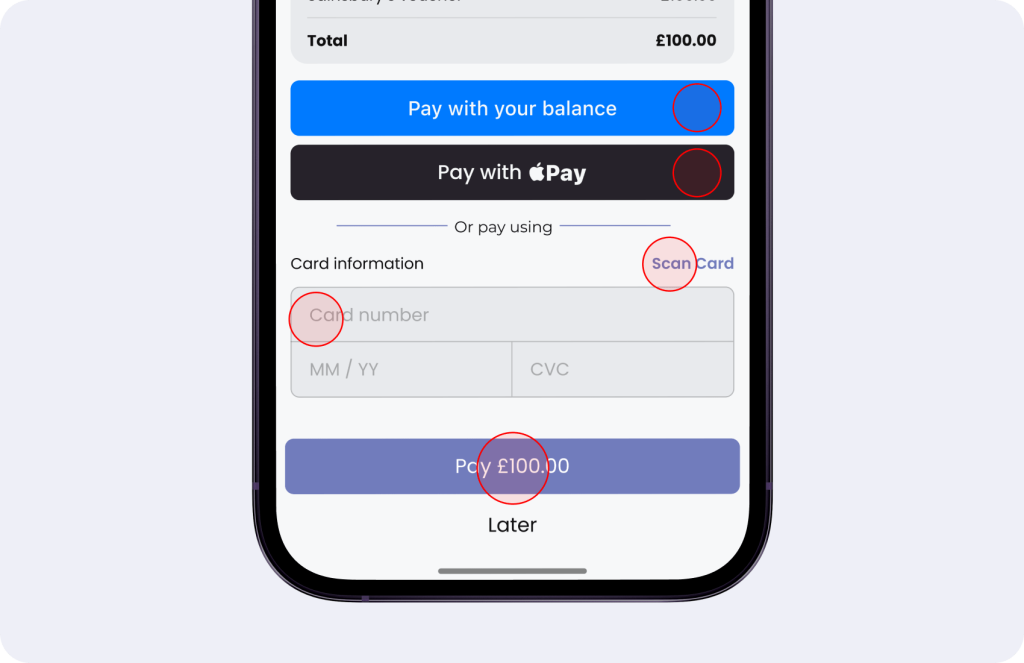
7. A pay screen will appear. You have several options here:

Pay with card – You can pay by entering your card details. Or you can scan your card to automatically populate these details. Tap the ‘Pay’ button at the bottom when you are ready.

Pay with your balance – This means you can pay with the funds in your Sync™ account. Tap the ‘Pay’ button at the bottom when you are ready.

Part pay with balance – This appears when you don’t have enough funds in your Sync™ account to pay the full amount. In this case, you can use the balance you have and supplement with another way to pay.

Pay with Apple Pay – This is simply paying through Apple Pay.

8. You’ve completed purchase of your voucher. Tap ‘Use voucher’ to access a digital version of your voucher which can be used in-store or online.

Please note: You will see your no fee transactions are automatically added to your Sync™ account at this point.

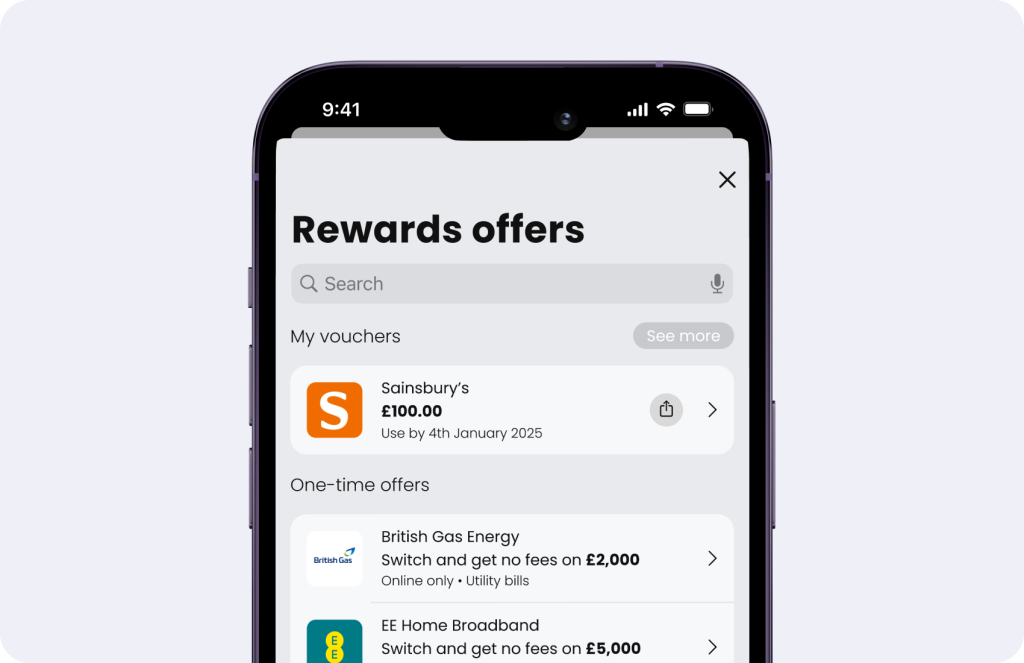
9. You can view your purchased vouchers at the top of the ‘Reward offers’ screen. Here you can:

  • Tap the voucher to access the digital voucher
  • Share with a friend using the share icon on the voucher
  • Swipe to the left and tap the bin button to archive

Please note: We are not provided within data on when the voucher has been used, so you will need to manually archive your vouchers. Simply swipe the voucher to the left and tap the bin button to archive.

How do I claim the no fee transactions attached to a Voucher? #

When you purchase a voucher, your no fee transactions are automatically added to your Sync™ account. So, you don’t need to lift a finger! Just sit back and enjoy having no fees on your next transactions.

Updated on August 21, 2025

What are your Feelings

  • Happy
  • Normal
  • Sad

Share This Article :

  • Facebook
  • X
  • LinkedIn
  • Pinterest

Powered by BetterDocs

Leave a Reply Cancel reply

Your email address will not be published. Required fields are marked *

Table of Contents
  • How do I purchase a Voucher?
  • How do I claim the no fee transactions attached to a Voucher?

© 2025 Sync™.